
Occasionally end users may end up without a secure token. This attribute is required to enable FileVault on any macOS device. Additionally, it is required for the end user to install updates on Apple silicon devices (this is a little complicated but for the purpose of this post I am ignoring volume ownership, as it is functionally equivalent to secure token in this respect).
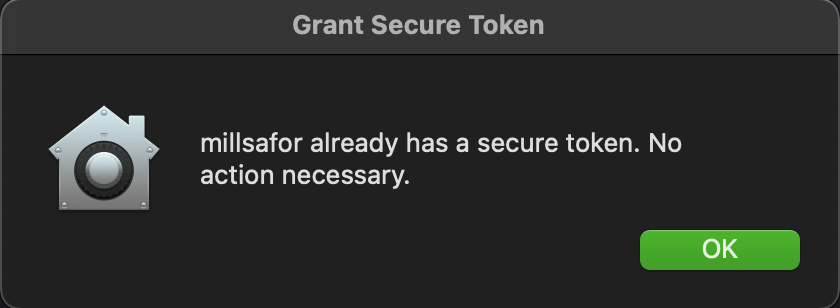
Use the following script in a Self Service policy to grant the end user a secure token. This script will check if the currently logged in user has a secure token. If so, a notification informs them that no action is required.
If the currently logged in user does not have a secure token you will be guided through the process to grant one. In order to grant a secure token to a user without one, an account with a secure token must be used. The script will find all secure token users on the system and list them for you. Select an account that you already know the password for.

Next you will be prompted for the existing secure token user’s password. This is required to grant the token to other users

Then, you will be prompted for the end user’s password to complete the process.

Finally, the script will check if a bootstrap token is escrowed with MDM, and escrows the token if needed.
The script is available below:
| #!/bin/sh | |
| # Set the icons and branding | |
| selfServiceBrandIcon="/Users/$3/Library/Application Support/com.jamfsoftware.selfservice.mac/Documents/Images/brandingimage.png" | |
| fileVaultIcon="/System/Library/CoreServices/CoreTypes.bundle/Contents/Resources/FileVaultIcon.icns" | |
| if [[ -f $selfServiceBrandIcon ]]; then | |
| brandIcon="$selfServiceBrandIcon" | |
| else | |
| brandIcon="$fileVaultIcon" | |
| fi | |
| # Start by setting result to UNDEFINED | |
| result="UNDEFINED" | |
| MissingSecureTokenCheck() { | |
| # Get the currently logged-in user and go ahead if not root. | |
| userName=$(/bin/ls -l /dev/console | /usr/bin/awk '{ print $3 }') | |
| # This function checks if the logged-in user has Secure Token attribute associated | |
| # with their account. If the token_status variable returns "0", then YES is set. | |
| # If anything else is returned, NO is set. | |
| if [[ -n "${userName}" && "${userName}" != "root" ]]; then | |
| # Get the Secure Token status. | |
| token_status=$(/usr/sbin/sysadminctl -secureTokenStatus "${userName}" 2>&1 | /usr/bin/grep -ic enabled) | |
| # If there is no secure token associated with the logged-in account, | |
| # the token_status variable should return "0". | |
| if [[ "$token_status" -eq 0 ]]; then | |
| result="NO" | |
| fi | |
| # If there is a secure token associated with the logged-in account, | |
| # the token_status variable should return "1". | |
| if [[ "$token_status" -eq 1 ]]; then | |
| result="YES" | |
| fi | |
| fi | |
| # If unable to determine the logged-in user | |
| # or if the logged-in user is root, then UNDEFINED is returned | |
| } | |
| MissingSecureTokenCheck | |
| if [[ $result = "NO" ]]; then | |
| # Current user does not have a secure token. Need to generate one. | |
| # Granting user needs to be an admin. Get all the admin users on the computer. | |
| adminUsers=$(dscl . read /Groups/admin GroupMembership | cut -d " " -f 2-) | |
| # For each user, check if they have a secure token | |
| for EachUser in $adminUsers; do | |
| TokenValue=$(sysadminctl -secureTokenStatus $EachUser 2>&1) | |
| if [[ $TokenValue = *"ENABLED"* ]]; then | |
| SecureTokenUsers+=($EachUser) | |
| fi | |
| done | |
| # List out the users with a secure token | |
| if [[ -z "${SecureTokenUsers[@]}" ]]; then | |
| # If no secure token admin users, show dialog stating such | |
| /usr/bin/osascript -e "display dialog \"\" & return & \"There are no secure token admin users on this device.\" with title \"Grant Secure Token\" buttons {\"OK\"} default button 1 with icon POSIX file \"$brandIcon\"" | |
| exit 0 | |
| else | |
| # Have user select a secure token user they know the password for | |
| adminUser=$( osascript -e "set ASlist to the paragraphs of \"$(printf '%s\n' "${SecureTokenUsers[@]}")\"" -e 'return choose from list ASlist with prompt "Select a user you know the password for:"' ) | |
| # Get a secure token users password | |
| adminPassword=$( /usr/bin/osascript -e "display dialog \"To grant a secure token\" & return & \"Enter login password for '$adminUser'\" default answer \"\" with title \"Grant Secure Token\" buttons {\"Cancel\", \"Ok\"} default button 2 with icon POSIX file \"$brandIcon\" with text and hidden answer | |
| set adminPassword to text returned of the result | |
| return adminPassword") | |
| # Exit if user cancels | |
| if [ "$?" != "0" ] ; then | |
| echo "User aborted. Exiting…" | |
| exit 0 | |
| fi | |
| fi | |
| # Try the entered password | |
| passCheck=`dscl /Local/Default -authonly "${adminUser}" "${adminPassword}"` | |
| # If the credentials pass, continue, if not, tell user password is incorrect and exit. | |
| if [ "$passCheck" == "" ]; then | |
| echo "Password Verified" | |
| else | |
| echo "Password Verification Failed. Please try again." | |
| /usr/bin/osascript -e "display dialog \"\" & return & \"Password Verification Failed. Please try again.\" with title \"Grant Secure Token\" buttons {\"OK\"} default button 1 with icon POSIX file \"$brandIcon\"" | |
| exit 1 | |
| fi | |
| # Get the logged in user's password via a prompt | |
| echo "Prompting ${userName} for their login password." | |
| userPassword=$( /usr/bin/osascript -e "display dialog \"To grant a secure token\" & return & \"Enter login password for '$userName'\" default answer \"\" with title \"Grant Secure Token\" buttons {\"Cancel\", \"Ok\"} default button 2 with icon POSIX file \"$brandIcon\" with text and hidden answer | |
| set userPassword to text returned of the result | |
| return userPassword") | |
| # Exit if user cancels | |
| if [ "$?" != "0" ] ; then | |
| echo "User aborted. Exiting…" | |
| exit 0 | |
| fi | |
| echo "Granting secure token." | |
| # Grant the token | |
| sysadminctl -secureTokenOn ${userName} -password ${userPassword} -adminUser ${adminUser} -adminPassword ${adminPassword} | |
| # Check for bootstrap token escrowed with Jamf Pro | |
| bootstrap=$(profiles status -type bootstraptoken) | |
| if [[ $bootstrap == *"escrowed to server: YES"* ]]; then | |
| echo "Bootstrap token already escrowed with Jamf Pro!" | |
| else | |
| # Escrow bootstrap token with Jamf Pro | |
| echo "No Bootstrap token present. Escrowing with Jamf Pro now…" | |
| sudo profiles install -type bootstraptoken -user "${adminUser}" -pass "${adminPassword}" | |
| fi | |
| elif [[ $result = "YES" ]]; then | |
| echo "Current user already has a secure token. No action necessary." | |
| /usr/bin/osascript -e "display dialog \"\" & return & \"$userName already has a secure token. No action necessary.\" with title \"Grant Secure Token\" buttons {\"OK\"} default button 1 with icon POSIX file \"$brandIcon\"" | |
| else | |
| echo "Undefined secure token status" | |
| /usr/bin/osascript -e "display dialog \"\" & return & \"Could not determine secure token status.\" with title \"Grant Secure Token\" buttons {\"OK\"} default button 1 with icon POSIX file \"$brandIcon\"" | |
| exit 1 | |
| fi |


