PrivilegesDemoter v3.0

PrivilegesDemoter version 3 is here, and it’s a big update. While the main functions remain, several new options are available to make deployment and configuration much more flexible.

The original posts for previous versions are available here:
v1.0
v2.0

Version 3 is available on GitHub

PrivilegesDemoter is a script that allows users to self manage local administrator rights, while reminding them not to operate as an administrator for extended periods of time. Additionally, each elevation and demotion event is recorded and saved to a log file.

PrivilegesDemoter 3 has been written to be customizable for a number of different deployment scenarios. PrivilegesDemoter may be used on its own in standalone mode, or conjunction with SAP Privileges. It may be configured to notify users with IBM Notifier, Swift Dialog, or Jamf Helper.

The PrivilegesDemoter script runs every 5 minutes to check if the currently logged in user is an administrator. If this user is an admin, it adds a timestamp to a file and calculates how long the user has had admin rights. Once that calculation passes a certain threshold, the user is reminded to operate as a standard user whenever possible.

Summary of Changes in v3

  • PrivilegesDemoter now uses just one script and one LaunchDaemon (as opposed to 2 of each in versions 1 and 2)
  • The script is controlled with a configuration profile (blog.mostlymac.privilegesdemoter).
  • There is a JSON Schema available for configuring with Jamf Pro.
  • You can now exclude multiple administrator accounts from demotion.
  • The _mbsetupuser and root users are now excluded from demotion by default.
  • Swift Dialog is now available as a notification agent in addition to IBM Notifier and Jamf Helper.
  • You may now use a custom name for the IBM Notifier binary (if you have re-branded it for your organization).
  • The demotion reminder threshold can now be set with a configuration profile separately from the SAP Privileges dock tile timeout.
  • The main text in the reminder can be customized.
  • You many now configure the user to be demoted silently without a notification at all.
  • The demotion script now runs locally by default. If you would like it to run from Jamf Pro as it did in versions 1 and 2, you may configure it that way.
  • You may now customize the Jamf trigger if demoting from a Jamf Pro policy.
  • The script now allows for standalone elevation and demotion actions (without deploying SAP Privileges) Note: This requires an MDM with the ability to run scripts from a Self Service portal (like Jamf Pro).
  • The script now includes several new options when running locally. Using the script alone you can elevate, demote, demote silently, print the current user’s status, and calculate how much admin time has passed since the last time PrivilegesDemoter ran.

More information about how to set-up, use, and configure all of the above is available in the GitHub Wiki for the PrivilegesDemoter project.

Demote on Login with SAP Privileges

This blog post outlines using a LaunchAgent that utilizes the PrivilegesCLI to demote users during login. This ensures that all users have standard privileges at the beginning of each user session.

Note: All of the following assumes that the SAP Privileges application is installed.

If that sounds interesting or useful, good news! It is really rather easy to implement.

The LaunchAgent includes a couple of sections:

  • AssociatedBundleIdentifiers – This section associates the LaunchAgent with the SAP Privileges application so that it is displayed properly in the Login Items GUI on macOS Ventura and newer operating systems.
  • ProgramArguments – This section runs the following PrivilegesCLI command to remove user rights: /Applications/Privileges.app/Contents/Resources/PrivilegesCLI --remove
  • RunAtLoad – Ensures that the LaunchAgent runs each time a new user session is loaded.

To implement this LaunchAgent, either build a package or copy the following plist file into /Library/LaunchAgents, and make sure that it has the following permissions: 644 POSIX and root:wheel as owner:group.

<?xml version="1.0" encoding="UTF-8"?>
<!DOCTYPE plist PUBLIC "-//Apple//DTD PLIST 1.0//EN" "http://www.apple.com/DTDs/PropertyList-1.0.dtd"&gt;
<plist version="1.0">
<dict>
<key>AssociatedBundleIdentifiers</key>
<array>
<string>corp.sap.privileges</string>
</array>
<key>Label</key>
<string>blog.mostlymac.demoteonlogin</string>
<key>ProgramArguments</key>
<array>
<string>/Applications/Privileges.app/Contents/Resources/PrivilegesCLI</string>
<string>–remove</string>
</array>
<key>RunAtLoad</key>
<true/>
</dict>
</plist>

The next time a user logs in, Privileges will ensure the session starts with standard user rights. Users may then use SAP Privileges to grant admin rights again as needed.

Install a Company Logo Without a Pkg using Jamf Pro

I have been doing this little trick for years so I thought I would create a blog post to share it.

Imagine you need to get your company logo onto computers so that you can brand some widget. When using tools that the user can interact with (like Nudge, IBM Notifier, Jamf Helper, SwiftDialog, or DEPNotify for instance) having a familiar logo or icon helps users to understand, verify, and trust the source of that window when it is presented. There’s the added benefit that it looks good too!

This method can be used to get any image file placed in any location, without having to build a package for distribution, all within Jamf Pro.

All you need do is upload an image to the Self Service section of a policy in Jamf, then use curl in a script to download that image from your Jamf Pro server and place it in the specified location. Here’s how I set it up:

  1. Upload the following script to your Jamf Pro server:
#!/bin/bash
fetch_from="$4"
save_to="$5"
# Check for the image and grab it if it does not exist
if [ ! -f "$save_to" ]; then
curl -o "$save_to" "$fetch_from"
fi
  1. Give the script parameters some useful labels. I used “Image URL” for parameter $4. This is the location of the image we will download. And “Path to Destination” for parameter $5. This is where the image will be saved on disk.
  1. Create a new policy in Jamf Pro and save it.
    IMPORTANT: When first creating the policy, leave it disabled by unchecking the “Enabled” checkbox.
  • General
  • Name: Download Company Logo
  • Enabled: No
  • Trigger: Recurring Check-in
  • Frequency: Once per computer
  • Scripts
  • Select script uploaded previously – do not configure any parameter values yet.
  • Scope
  • Targets: All Managed Clients or All Computers
  • Self Service
  • Check the box for “Make the policy available in Self Service”
  • Upload the image you would like to distribute.
  1. After creating and saving your policy, go to the Self Service tab and find the icon that you uploaded. Right click and select “Copy Image Address” to copy the URL of the image to your clipboard. Take note of this URL.
  1. While still on the Self Service page for your policy, click Edit in the lower right corner, then deselect the checkbox for “Make the policy available in Self Service”. Even though the policy is no longer available in Self Service, the icon remains so we can still access it in our script.
  1. Select the Options tab, then the Scripts section. Paste the image URL copied in step 4 into the “Image URL” field under Script Parameters.
  1. Enter the full path to where the image should be placed on disk, including the image name, into the “Path to Destination” field under Script Parameters. For example /Users/Shared/logo.png
  1. Return to the General section and check the Enabled box to enable the policy, then Save in the lower right corner.

That’s it. The image will be downloaded to each machine in scope and placed in the location of your choice. Now you can reference that image in other scripts and configurations as needed.

Using a Self Service Policy to Grant End Users a Secure Token

Occasionally end users may end up without a secure token. This attribute is required to enable FileVault on any macOS device. Additionally, it is required for the end user to install updates on Apple silicon devices (this is a little complicated but for the purpose of this post I am ignoring volume ownership, as it is functionally equivalent to secure token in this respect).

Use the following script in a Self Service policy to grant the end user a secure token. This script will check if the currently logged in user has a secure token. If so, a notification informs them that no action is required.

If the currently logged in user does not have a secure token you will be guided through the process to grant one. In order to grant a secure token to a user without one, an account with a secure token must be used. The script will find all secure token users on the system and list them for you. Select an account that you already know the password for.

Next you will be prompted for the existing secure token user’s password. This is required to grant the token to other users

Then, you will be prompted for the end user’s password to complete the process.

Finally, the script will check if a bootstrap token is escrowed with MDM, and escrows the token if needed.

The script is available below:

#!/bin/sh
# Set the icons and branding
selfServiceBrandIcon="/Users/$3/Library/Application Support/com.jamfsoftware.selfservice.mac/Documents/Images/brandingimage.png"
fileVaultIcon="/System/Library/CoreServices/CoreTypes.bundle/Contents/Resources/FileVaultIcon.icns"
if [[ -f $selfServiceBrandIcon ]]; then
brandIcon="$selfServiceBrandIcon"
else
brandIcon="$fileVaultIcon"
fi
# Start by setting result to UNDEFINED
result="UNDEFINED"
MissingSecureTokenCheck() {
# Get the currently logged-in user and go ahead if not root.
userName=$(/bin/ls -l /dev/console | /usr/bin/awk '{ print $3 }')
# This function checks if the logged-in user has Secure Token attribute associated
# with their account. If the token_status variable returns "0", then YES is set.
# If anything else is returned, NO is set.
if [[ -n "${userName}" && "${userName}" != "root" ]]; then
# Get the Secure Token status.
token_status=$(/usr/sbin/sysadminctl -secureTokenStatus "${userName}" 2>&1 | /usr/bin/grep -ic enabled)
# If there is no secure token associated with the logged-in account,
# the token_status variable should return "0".
if [[ "$token_status" -eq 0 ]]; then
result="NO"
fi
# If there is a secure token associated with the logged-in account,
# the token_status variable should return "1".
if [[ "$token_status" -eq 1 ]]; then
result="YES"
fi
fi
# If unable to determine the logged-in user
# or if the logged-in user is root, then UNDEFINED is returned
}
MissingSecureTokenCheck
if [[ $result = "NO" ]]; then
# Current user does not have a secure token. Need to generate one.
# Granting user needs to be an admin. Get all the admin users on the computer.
adminUsers=$(dscl . read /Groups/admin GroupMembership | cut -d " " -f 2-)
# For each user, check if they have a secure token
for EachUser in $adminUsers; do
TokenValue=$(sysadminctl -secureTokenStatus $EachUser 2>&1)
if [[ $TokenValue = *"ENABLED"* ]]; then
SecureTokenUsers+=($EachUser)
fi
done
# List out the users with a secure token
if [[ -z "${SecureTokenUsers[@]}" ]]; then
# If no secure token admin users, show dialog stating such
/usr/bin/osascript -e "display dialog \"\" & return & \"There are no secure token admin users on this device.\" with title \"Grant Secure Token\" buttons {\"OK\"} default button 1 with icon POSIX file \"$brandIcon\""
exit 0
else
# Have user select a secure token user they know the password for
adminUser=$( osascript -e "set ASlist to the paragraphs of \"$(printf '%s\n' "${SecureTokenUsers[@]}")\"" -e 'return choose from list ASlist with prompt "Select a user you know the password for:"' )
# Get a secure token users password
adminPassword=$( /usr/bin/osascript -e "display dialog \"To grant a secure token\" & return & \"Enter login password for '$adminUser'\" default answer \"\" with title \"Grant Secure Token\" buttons {\"Cancel\", \"Ok\"} default button 2 with icon POSIX file \"$brandIcon\" with text and hidden answer
set adminPassword to text returned of the result
return adminPassword")
# Exit if user cancels
if [ "$?" != "0" ] ; then
echo "User aborted. Exiting…"
exit 0
fi
fi
# Try the entered password
passCheck=`dscl /Local/Default -authonly "${adminUser}" "${adminPassword}"`
# If the credentials pass, continue, if not, tell user password is incorrect and exit.
if [ "$passCheck" == "" ]; then
echo "Password Verified"
else
echo "Password Verification Failed. Please try again."
/usr/bin/osascript -e "display dialog \"\" & return & \"Password Verification Failed. Please try again.\" with title \"Grant Secure Token\" buttons {\"OK\"} default button 1 with icon POSIX file \"$brandIcon\""
exit 1
fi
# Get the logged in user's password via a prompt
echo "Prompting ${userName} for their login password."
userPassword=$( /usr/bin/osascript -e "display dialog \"To grant a secure token\" & return & \"Enter login password for '$userName'\" default answer \"\" with title \"Grant Secure Token\" buttons {\"Cancel\", \"Ok\"} default button 2 with icon POSIX file \"$brandIcon\" with text and hidden answer
set userPassword to text returned of the result
return userPassword")
# Exit if user cancels
if [ "$?" != "0" ] ; then
echo "User aborted. Exiting…"
exit 0
fi
echo "Granting secure token."
# Grant the token
sysadminctl -secureTokenOn ${userName} -password ${userPassword} -adminUser ${adminUser} -adminPassword ${adminPassword}
# Check for bootstrap token escrowed with Jamf Pro
bootstrap=$(profiles status -type bootstraptoken)
if [[ $bootstrap == *"escrowed to server: YES"* ]]; then
echo "Bootstrap token already escrowed with Jamf Pro!"
else
# Escrow bootstrap token with Jamf Pro
echo "No Bootstrap token present. Escrowing with Jamf Pro now…"
sudo profiles install -type bootstraptoken -user "${adminUser}" -pass "${adminPassword}"
fi
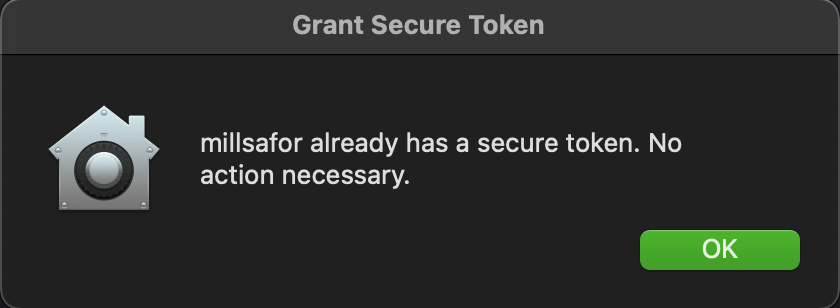
elif [[ $result = "YES" ]]; then
echo "Current user already has a secure token. No action necessary."
/usr/bin/osascript -e "display dialog \"\" & return & \"$userName already has a secure token. No action necessary.\" with title \"Grant Secure Token\" buttons {\"OK\"} default button 1 with icon POSIX file \"$brandIcon\""
else
echo "Undefined secure token status"
/usr/bin/osascript -e "display dialog \"\" & return & \"Could not determine secure token status.\" with title \"Grant Secure Token\" buttons {\"OK\"} default button 1 with icon POSIX file \"$brandIcon\""
exit 1
fi